
Originally published April 9, 2016 | Updated October 31, 2026
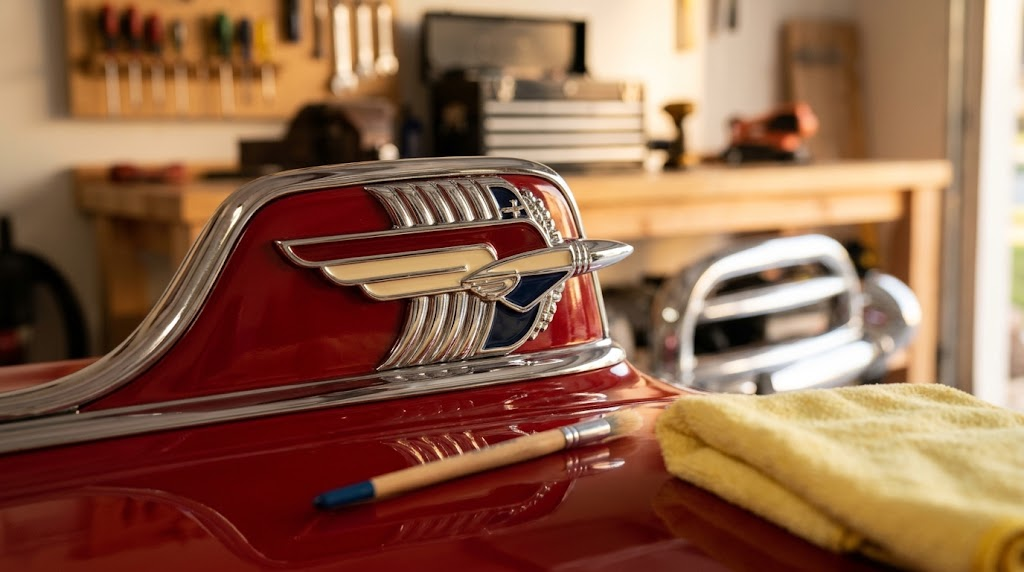
Walk around any classic car at a show and watch where people look. After the paint and the chrome bumpers, their eyes land on the little details. The emblem on the fender. The ornament on the hood. When those pieces are faded, chipped or tarnished, the whole car looks tired.
The good news is that car emblem and hood ornament restoration is a task many people consider one of the most doable jobs in this hobby. You don’t need a fancy shop. You need patience, a steady hand and a few inexpensive supplies. This guide walks you through the whole process to restore car emblems and hood ornaments, from taking the pieces off the car to the final polish, and it tells you when it’s smarter to hand the job to a professional.
Why Original Emblems Are Worth Saving
Original emblems carry the look, weight and detail the factory intended. Collectors and judges notice that. A correct, well-kept emblem helps a car look authentic, and it can support its value when it’s time to sell.
Replacements are not always easy. New old stock (NOS) emblems, which are original parts that were never sold or installed, get harder to find every year, and prices climb with them. Reproduction badges can fill the gap, but they sometimes differ from the originals in fit, weight or fine detail. If your original piece can be saved, saving it is usually the better move.
What Emblem and Hood Ornament Restoration You Can Do at Home and What Needs a Pro
Before you buy anything, look closely at your emblem. Most are made of cast metal, and many older ones are typically “pot metal,” a cheap zinc-based alloy that was chrome plated at the factory. It casts nicely, but it can pit, flake and even crumble with age.
Good candidates for a home restoration:
- Faded, chipped or missing paint in the recessed (sunken) areas
- Dull or lightly tarnished chrome that is still smooth and solid
- Dirt and old wax packed into tiny corners
Better left to a professional plater:
- Chrome that is peeling, bubbling or flaking off
- Deep pitting you can feel with a fingernail
- Cracks, crumbling metal or broken mounting pegs
Replating takes specialized equipment. If your emblem has plating damage, search for a chrome or pot metal restoration shop and ask to see examples of their work. You might still be able to do the paint work yourself once the plating is sorted out.
Supplies for Emblem Restoration
You may find you have half of these items in your garage already.
- Dish soap and warm water
- A soft toothbrush or other small brush
- Clean, lint-free rags or microfiber cloths
- Safety glasses and gloves
- Wooden toothpicks and a hobby knife
- Plastic trim tools (for removal)
- Paint stripper (only if you truly need it)
- Fine pointed paintbrushes
- Enamel model paint kit
- Disclosure: As an Amazon Associate, I earn from qualifying purchases. If you buy through a link in this article, Classic Cars Online US may earn a small commission at no extra cost to you.
- Paint thinner that matches your paint
- Chrome polish
A quick tip on color: take the emblem along when you shop for paint, or at least bring a clear photo in daylight. Hobby shops carry a huge range of shades, and matching in person beats guessing from a screen.
Step-by-Step Car Emblem Restoration
Remove the Emblem Without Hurting the Car
Most emblems are held on by pegs in the back that slip through holes in the body panel, with a clip or nut on the other side. Others are glued on with adhesive. Check how yours is mounted before you pull anything.
For adhesive-mounted emblems, warm the area gently with a hair dryer and slide a plastic trim tool or dental floss behind the emblem to work it loose. Put painter’s tape around the area first so a slip doesn’t scratch your paint. For peg-mounted emblems, you may need to reach behind a panel to remove the retaining clips.
If you can’t get an emblem off without risking damage, stop and ask a body shop to do it. A repaired fender costs far more than a shop’s labor.
Once it’s off, here’s a handy trick for holding the piece steady while you work: punch holes in a cardboard box and slide the emblem’s pegs through them. Now it sits upright and level, and your hands are free.
Clean It Gently First
Start with warm, soapy water and a soft toothbrush. Work the bristles into the small corners and ribs. Rinse, dry well and look again. You’d be surprised how many emblems turn out to be less damaged than they looked under a layer of grime and old wax.
Remove Loose and Chipped Paint
Emblems are made of tiny recessed areas separated by thin metal ribs. Any new paint has to bond to clean, bare metal, so loose or flaking paint has to go.
Try the gentlest tools first. A wooden toothpick or the tip of a hobby knife can lift out small chips. Go slowly and keep the blade away from the chrome ribs, because scratches there are permanent.
If old paint won’t budge, a small amount of paint stripper on a cotton swab can help. Test it on the back of the emblem first, wear gloves and glasses, and work in a well-ventilated space. Never sandblast a chromed emblem, because it will strip the plating.
One safety note: paint on very old parts can contain lead. Avoid dry sanding or creating dust, wash your hands afterward and dispose of scrapings carefully. The EPA’s lead safety information explains how to handle it.
When the old paint is gone, wipe the emblem with paint thinner on a clean cloth, let it dry completely, then wash it again with soap and water. Dry it thoroughly. Any leftover oil or residue can keep new paint from sticking.
Repaint the Recessed Areas
This is the part that takes the most patience, and it’s the most satisfying.
- Stir or shake your model paint well. Stir it for a couple of minutes if it has been sitting for a while.
- Pour a small amount into a clean container and thin it with a few drops of thinner until it flows like warm syrup. Paint works best in a cool to room-temperature space, around 70 degrees F or lower, which gives it time to settle smoothly.
- Load a drop of paint onto the tip of a fine brush.
- Touch the drop into the recessed area and let it flow out on its own.
The key is that you are not brushing the paint on. Pushing paint around leaves streaks and gets it onto the chrome. Instead, let several small drops run together until the area fills in. If the paint stays in a thick blob, it needs a bit more thinner.
Set the emblem level and let it dry completely before you touch it. Depending on the paint, that can mean a few minutes or a few hours. A hair dryer on a low, warm setting or a closed, sunny window can speed things along, but air drying is typically best to avoid damage. Also, keep dust away from the surface. Wash your brush in thinner between colors so shades don’t mix.
Clean Up the Edges
Paint likes to wander on something this small. Let everything dry overnight, then carefully scrape any stray paint off the ribs and raised edges with a hobby knife.
Don’t chase perfection. Factory emblems weren’t flawless, and most people look at them from several feet away. At that distance, a clean, even job looks sharp.
Polish the Chrome
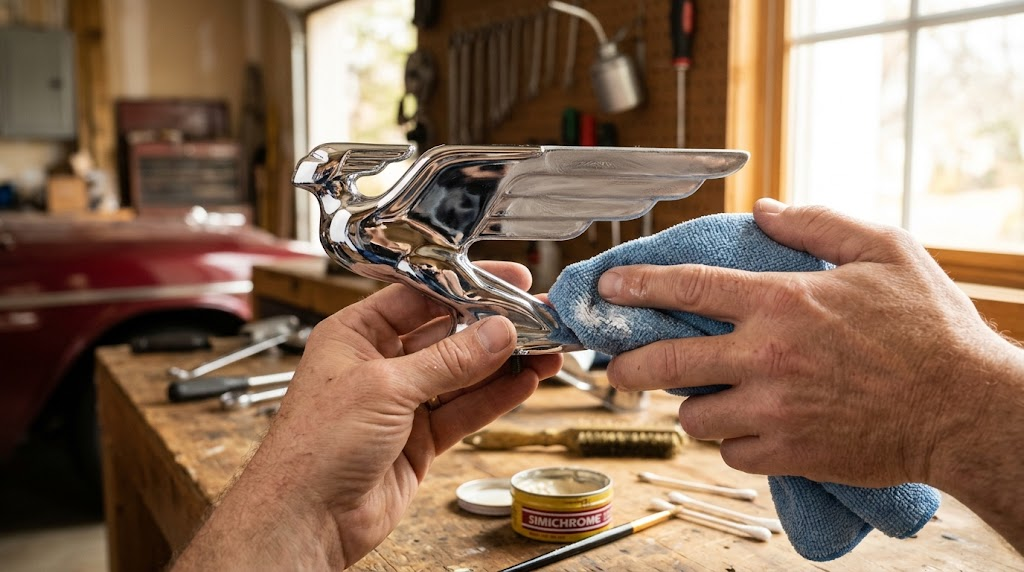
When the paint is fully dry, bring back the shine. Start with a good chrome polish and a soft cloth, working around the new paint rather than over it.
Some restorers use extra-fine (0000) steel wool for stubborn tarnish on solid chrome. It can work, but it can also leave fine scratches on thin or worn plating, so test it on the back of the emblem first and use very light pressure. If you’re not sure, stay with polish and a soft cloth.
Once the paint has cured for a few days, a thin layer of wax on the chrome will help protect it. Keep the wax off the fresh paint until it has had time to harden.
Hood Ornament Restoration: Use Extra Care for Fragile Metal
Hood ornaments follow the same basic steps as flat emblems, but they come with a few extra concerns. They stick out, so they take more abuse from weather and handling. Many older ones are pot metal, which can be brittle, so lift and clean them gently.
Use the same sequence: remove, clean, check the plating, repaint any recessed detail, then polish. Pay special attention to the base and mounting hardware. A loose or cracked mount is a good reason to pause and talk to a restoration shop before you reinstall it, because a hood ornament that works loose can be lost on the road.
Mistakes That Can Ruin a Good Emblem
Learn from the folks who went before you. These are the most common ways a good emblem gets damaged:
- Brushing or pushing paint instead of letting it flow
- Using thick paint straight from the bottle
- Skipping the cleaning step before painting
- Scraping with sharp tools near the chrome ribs
- Sandblasting chromed parts
- Rushing the drying time and fingerprinting the paint
- Prying an emblem off without protecting the body paint
When an Emblem Can’t Be Saved
Sometimes the damage is just too much. If you need a replacement, check swap meets, classic car classifieds and online marketplaces for NOS or good used originals, and compare them with the reproduction options. Ask sellers for clear photos of the front, back and mounting pegs, and compare part numbers when you can. A good used original that you repaint yourself can be a smart middle ground.
A Small Emblem Can Help Bring a Classic Car Back to Life
The next time you’re at a car show, take a closer look at the cars that stop you in your tracks. Chances are the details are doing a lot of the work. A freshly restored emblem or hood ornament won’t change what your car is, but it will change how people see it, and how proud you feel when you step back and look it over.
Start with one emblem, take your time, and let the paint do its thing. Your hands will thank you for the practice, and your car will thank you for the care.
Join the conversation!
Follow Classic Cars Online US on YouTube for more classic-car features, restoration stories and automotive history.
Join us on Facebook to share your own restoration projects, compare notes with other enthusiasts and keep the conversation going.
There’s always another amazing car worth talking about. We’ll see you at the starting line!